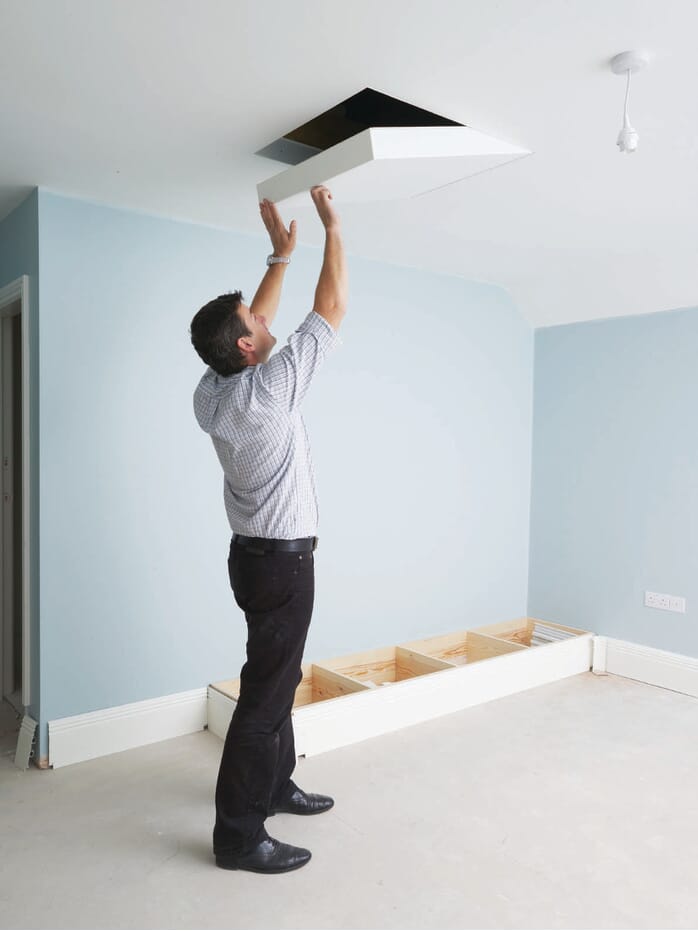
If you are looking to have a loft hatch installed and are considering doing it yourself, you need to ensure that you have all the tools you need to get the job done properly.
Lots of people choose to fit their own loft hatches, and with a little time and patience, it can be a relatively simple job. Read our guide on how to install a loft hatch below.
Making sure you have chosen the right size and style is a good first step!
The most popular loft hatch size has a fitting size of 562mm x 726mm, plus extra for the overall frame. If you are replacing your existing loft hatch or have decided to go bigger, this most common size is ideal and will work well if you only need to access the loft space occasionally. If you do need permanent access, however, you might wish to consider loft ladder installation.
How to Install a Loft Hatch - Considerations
Wondering how to install a loft hatch yourself? Firstly, you should be clued up on some considerations to factor in. You must familiarise yourself with the process of how to install a loft hatch before starting the job, and ensure you have all the right tools to do so. Please remember that before starting work, you might also need building regulation approval, so find out and apply as there are a lot of regulations around converting your loft space, which could apply to you...
What type of loft hatch do you need? You will need to choose the right size of loft hatch depending on the size of the opening into your loft. You should also make certain that the enlargement that you require will not mean cutting through supporting beams or timber intels. If you don’t already have a loft hatch installed, check with a professional if in any doubt about where to cut the opening. You can also use a stud, pipe and wire detector to help ensure that there aren’t pipes or wires in the area where you intend to make the hole. Doing this can also detect your ceiling joists so you can better understand where to create an access point.
How to Install a Loft Hatch - Step by Step
1. Prepare the Opening
When installing a loft hatch, it is important to ensure that the structural opening is no less than 7mm larger when comparing it to the size of the panel and the back of your frame. So, if you take a 600 x 600mm panel as an example, the hole you create needs to be a minimum of 607 x 607mm.
2. Prepare the Hatch
If you need to, you now have to remove your door. This can be done by simply leaving the door ajar and then removing the washers and nuts from the hinge system. Once this has been done, the door should lift out.
If you have chosen a fire-rated frame, you must make sure that you apply the fire mastic towards the picture frame's rear before fitting the frame within the aperture...
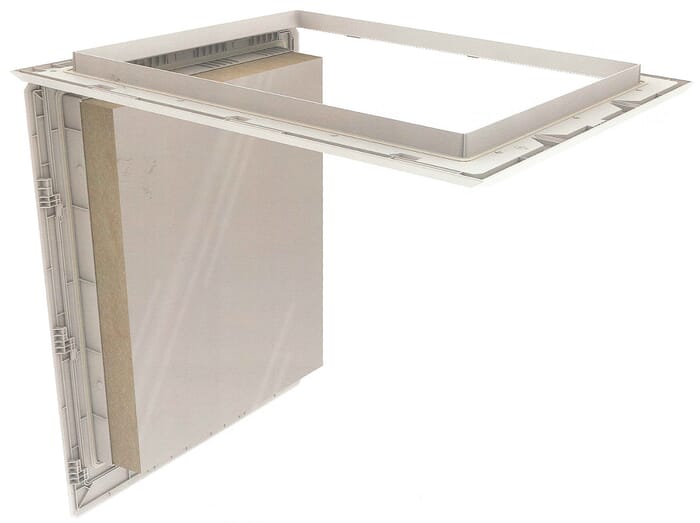
3. Fit your Frame in Place
The next step is to affix the frame. This can be done using the appropriate fixings and fixing holes. You will also likely be required to drill out the locking slots of the 3-way lock shoot bolt.
It is important to make sure that the frame is cut out in a square shape across its diagonals. A fire-rated frame must have the fire mastic applied across the rear surface of the frame. Make sure that the sealing is a minimum of 5mm wide compared to the supporting construction.
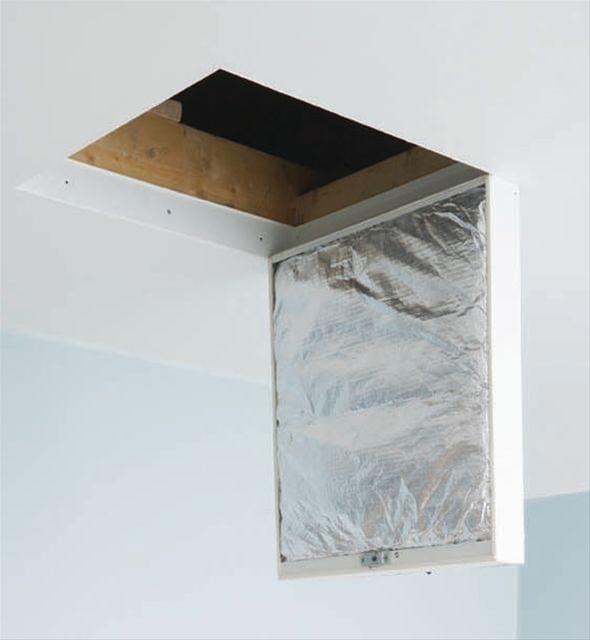
4. Door Fitting
Finally, you need to reinstall your door. Make sure that there is a 2mm gap between the frame and the door. Once you are sure this gap is established, you can then re-bolt the hinge and secure the door.
Our Loft Hatch Range:
At Loft Centre, we provide many different styles that come in various sizes.
Loft Centre Plastic Loft Hatch (Twist Action)
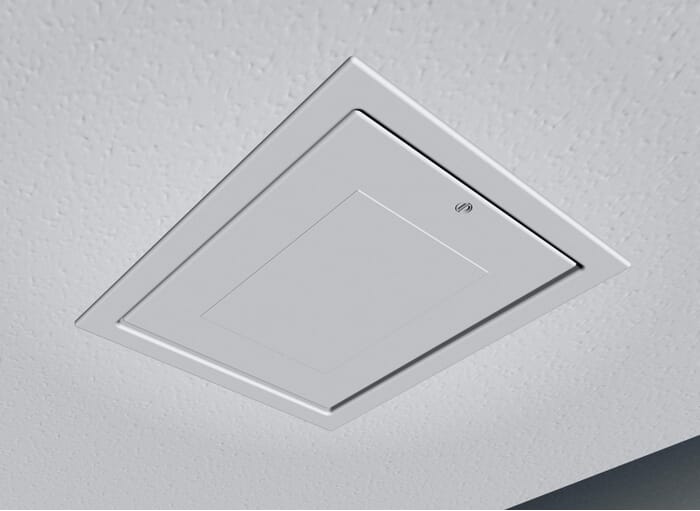
The Plastic Loft Hatch (Twist Action) offers a sleek, modern style, making it a popular choice for those who are looking for an unobtrusive hatch that will blend in. It’s durable and tough yet easy to install. When installing a loft hatch, our plastic loft hatch is certainly a hassle-free maintenance option.
Loft hatch size & dimensions:
|
Structural Opening / Fitting Size |
562mm x 726mm |
|
Trapdoor - Clear Opening Size |
530mm x 700mm |
|
Overall Frame Size |
821mm x 656mm |
Compatible loft ladders:
- Werner Easiway 3-section aluminium sliding loft ladder
- Werner Deluxe 2-section aluminium sliding loft ladder
Loft Centre Plastic Loft Hatch (Slide Action)
The Plastic Loft Hatch (slide action) is similar in style to the plastic loft hatch (twist action), the main difference is that the opening is a slide action as opposed to a twist. .
Loft hatch size & dimensions:
|
Structural Opening / Fitting Size |
562mm x 726mm |
|
Trapdoor - Clear Opening Size |
545mm x 715mm |
|
Overall Frame Size |
856mm x 686mm |
Compatible loft ladders:
- Youngman Easiway 3-section aluminium sliding loft ladder
- Werner Deluxe 2-section aluminium sliding loft ladder
Loft Centre Fire-Rated Loft Hatch
The Loft Centre Fire-Rated Loft Hatch is entirely compliant with Building Regulations Document L1 & L2 (2002), and will give 1 hour of fire protection. The hatch itself has a textured feel and a white powder-coated finish, making it a good match for most home interiors.
Loft hatch size and dimensions:
The Loft Centre fire-rated loft hatch is available in 4 standard sizes. Find the technical data, like the loft hatch sizes and dimensions, here.
Compatible loft ladders for all 4 sizes:
- Youngman Easiway 3-section aluminium sliding loft ladder
Loft Hatch Installation Made Easy!
And there you have it, you now know how to install a loft hatch safely and easily. The installation will likely take around an hour to complete, but leave yourself longer if you don't usually dabble in DIY activities. The steps are relatively straightforward, and by following the above, you should have your new loft hatch fitted in no time. However, if you are still unsure of how to install a loft hatch, it might be better to enlist the services of a professional to help you.
*Please note that we do not provide services to fit loft hatches.