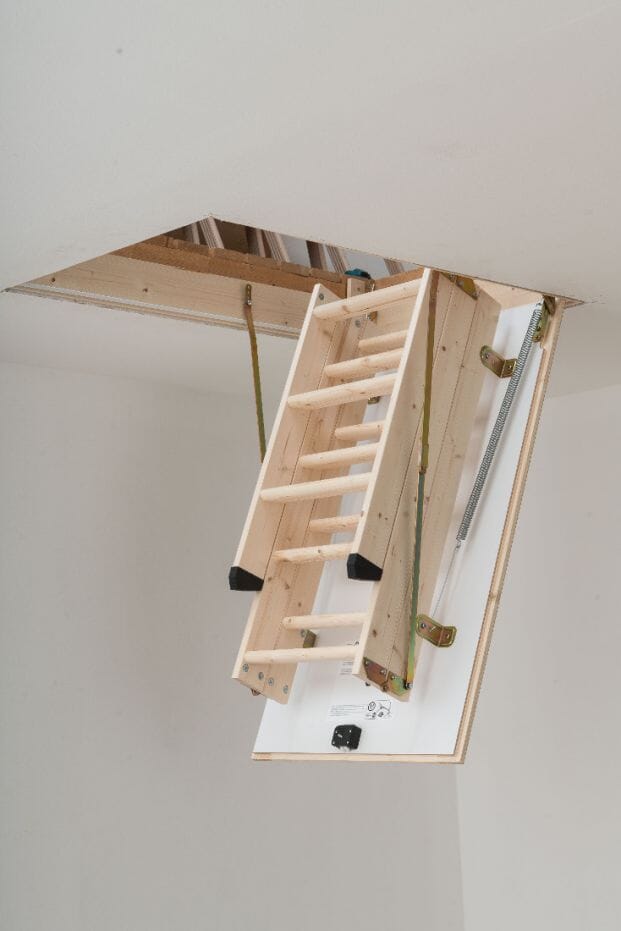
If you are wanting to transform your unused loft into a new space, you'll need to know how to fit a loft ladder. Loft Centre will take you through an easy step by step guide to help you with your loft conversion.
Preparation
To fit your timber folding loft ladder, you will need:
- A timber folding loft ladder
- Tape measure
- Hand saw
- 75 mm no. 10 wood screws
- Hammer
- Level
- Step ladder
- Plasterboard saw
- 50 mm oval wire nails
- Framing timber
- Safety gear
- Nails
- Set square
- A pencil
- Cordless drill Packers
- Reciprocating saw
*Note that it is advised to undergo the following with two people.
Selecting the best loft ladder for your needs
Before you start installing, we recommend looking at our guide on choosing the best loft ladder for your space. Browse through our best-selling loft ladders and loft hatches.
Choosing where to install a loft ladder
Position your loft opening more than 1 meter from the external wall, this ensures you have enough headroom. Making sure to avoid any issues, you should check there will be enough space for headroom in your preferred location before you begin the installation.
Making an opening in the ceiling for your loft ladder
Before making any hole in the ceiling, make sure that there are no obstructions like cables or pipes. Once you have measured your new loft ladder, measure out where your new opening will be using a level, pencil, tape measure and ruler. Working out the centre of the new hole first, and then measuring and marking the sides and ends. Wearing your safety gear, cut around the perimeter using a plasterboard saw. Now that you have got the plasterboard cut, if you have obstructing joists, you will need to cut these out. Before cutting any joist, establish whether they are structural or load bearing (a builder can help you determine this). You will have to get into the ceiling to cut these joists, so make sure your assistant can help you with this. Remember the ladder should be installed running in the direction of the joists, and not against.
Fitting new struts to the box frame
Now you've got the joists out the way, you’re ready to measure your new struts and cut them so that they run the length of the box frame. Nail these in, on either side of the opening.
Installing the loft ladder into the opening
For this step you will need your assistant to help you lift the loft ladder into position. To temporarily brace the loft ladder, you need to install your support battens. We suggest using scrap pieces of timber, nail one block in at the far end so that it sticks out over the edge so that the unit can sit on top of it. Place the far end in first, making sure it sits on the block. Once the loft ladder is in, nail another block to the other end, making sure it does not overlap the door, only covering the frame.
Fixing the box frame
Once the loft ladder is in position, begin by shifting the loft ladder to one side of the struts, making sure the door frame is square. Before opening the door, make sure nothing is obstructing the ladder coming down. Now you can open the door to the loft ladder. You will need to go up into the loft for this step. Using your ladder go up into the ceiling and screw into the side of the strut. You will need to pre-drill these as you will be drilling into hard wood. Using 75mm wood screws, 3 screws altogether, one in the middle and two 100mm away from either end.
Using packers, pack the side where there's a gap. When packing, always make sure to do this really tight, if it's too loose the frame will shift when you put the screws in. Pre-drill and repeat on the other side.
Cutting the ladder to the correct height
Now it's time to cut the ladder to the right height. To do this you need to measure from the ladder, towards the ground and then transfer that measurement from the join down. Cut it off using a hand saw. Always wear gloves, protective eyewear and ear muffs when doing this step. Then put the plastic feet on the bottom of your ladder.
Finishing off the job
Now you can climb up the ladder steps to secure the loft ladder in position. Check that the door closes fine and that it is square, then take off your temporary blocks with your hammer. We suggest applying mitred architrave around the edge of the box and frame to make it look neat and tidy. While this is a messy job, once you've finished, it's rewarding to know that you have a whole new space to use up in your loft.
*Please note that due to the diverse range of timber folding loft ladders available, other elements of the installation could be required that are not covered in this guide. For example, some of our timber folding loft ladders will require you to secure the ladder to the trapdoor or construct the spring mechanism.
Please follow manufacturer's instructions and if unsure, contact your supplier or enlist the services of a professional to help you.